
It's beginning to look a lot like Christmas! Sparkles, trims, and shiny things...All overtaking my desk these days. As I transition into the Holiday season of crafting, my heart is full of joy and creative ideas...I can hardly wait to start sharing them all here with you!

First up, I'm sharing a super easy way to use up all of those cover dies that might be hiding in your stash! I promise, they don't even need to be Christmas-y to pull off major holiday points.
This particular design is a summertime release, but it looks super festive all decked out in glittery bits, doesn't it? I will admit - it is a little more involved than your average shaker, as it does require filling each cubby with different colors of sparkly things, but I love the look and think it's worth that little bit of extra effort.

You can see how I make my shakers in this video I shared recently. This particular design follows the paper-stacking method. The only change being that each floral is filled with a different color of confetti. I also used my fine-tip glue gun (as opposed to a glue pen) to adhere the final layer, which helped me ensure that all the little pockets sealed well, so that the colors would not run into one another.
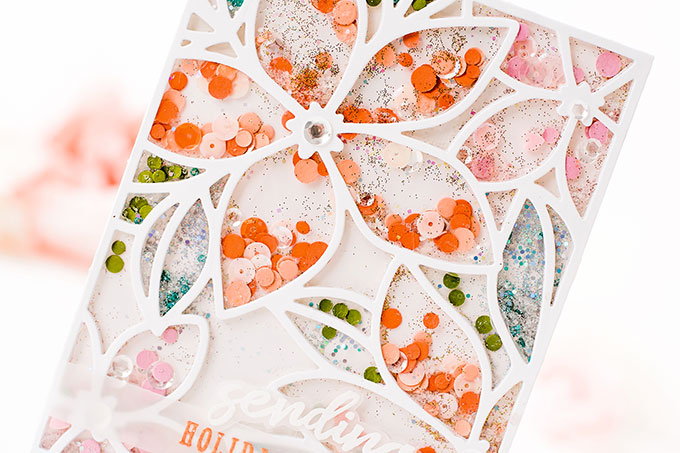
I love how striking this technique is...All one really needs to finish it off, is a simple sentiment.

I added one here with a little bit of heat-embossing on vellum.

For my next card, I wanted to use all the inside bits left after cutting out the panels for my first card.
And I'm also sharing a brand new video over on my YouTube channel!
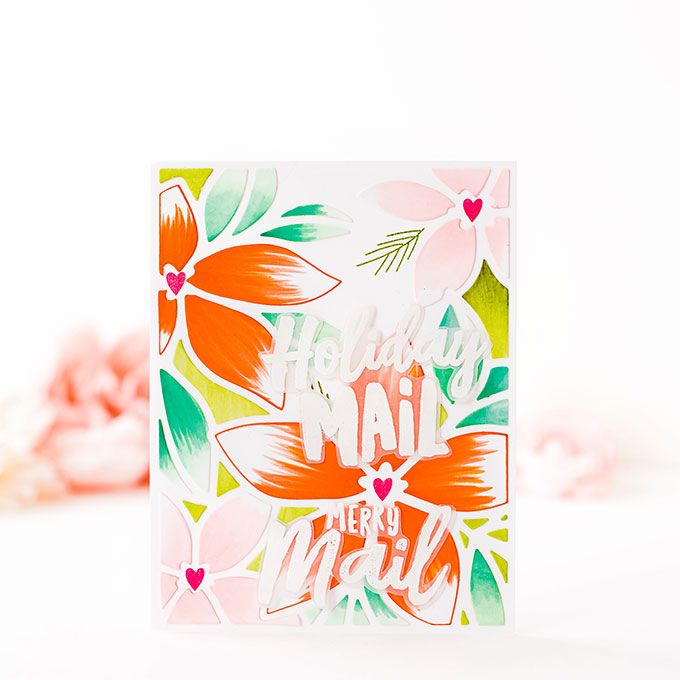
I did a similar marker flick technique in a Summertime post, and thought it could use a Christmas do-over. When I made my first card with this cover die a few months back, I filmed a video, and today, I'm sharing it over on YouTube...It's a quick process video showing how I colored the florals, and how I put my original card together. You can see my video here.

I followed the same technique here as I did in the video - coloring each little floral and leafy bit - but opted to leave the outline out. I also added tiny hearts and greenery to the final panel. You may also notice that I used less contrasting colors, so the flicks do not fade as softly as they do in the original, but I think it works for this bold and bright look.

For the sentiment, I added a bit of embossed vellum :)

This is a really easy card to reproduce, because the coloring can be done while relaxing about, or taken on-the-go.

I have a feeling this design will make it into the final card list this year!
What is on your desk these days, my friends? Planning on doing any coloring on your Christmas cards?

This list may contain affiliate links. Using these links before shopping will never add any extra cost to your purchase, but will go a long way in helping support this little blog and new content.
I only share products I love, and think you will too :)
Biggest thank you's for visiting and for your support! It means so much!


Ivana, I consider myself shaken, and stirred by these beauties!! xo
ReplyDelete=]
Two beautiful cards Ivana, I especially love the incredible shaker!
ReplyDeleteThese are so awesomely fun, upbeat and bursting with holiday season cheer. Their vibrant colour palettes instantly made me think how well suited they'd be for those who celebrate the holidays in warmer parts of the world.
ReplyDeleteAutumn Zenith 🎃 Witchcrafted Life
You never cease to amaze me, Ivana! Both of these are so wonderfully unique & beautiful!
ReplyDelete